
- 0
- 3,510 words
As an Amazon Associate I earn from qualifying purchases.
This post contains affiliate links.
On the JJ Barnes Blog, master effective nail repair tips to heal peeling and split nails, protect natural growth, and maintain healthy hands without expensive routines.
Peeling, splitting, and thin nails can ruin a manicure in minutes when a tiny snag catches on a sweater, a split travels across the surface, or layers flake after polish removal. Covering the damage with thick gel polish often makes nails feel weaker over time, which is why gentle repair strategies protect the nail while it grows. Simple tools like a clean file, hand cream, cuticle oil, gloves, and gentle polish removal create a real difference without requiring expensive routines.
Dryness caused by frequent washing, cleaning, polish changes, gel manicures, or extensions can be managed by trimming snags before they spread, filing split nails smoothly in one direction, and shielding hands from harsh chemicals. Cuticle oil, nail balms, silk patches, and short breaks from polish provide effective support when used with patience as the nail grows out. Building these small daily habits supports long-term health instead of relying on temporary cover-ups.
Trimming loose corners with clean clippers and smoothing edges with a fine-grit file prevents weak points from spreading further. Wearing rubber gloves during washing and applying daily moisture with cuticle oil or thick nail balm keeps the nail plate, sidewalls, and cuticles hydrated. Knowing when to stop using nails as tools, taking a break from extensions, or seeking professional help for persistent pain, swelling, or dark streaks ensures natural nails recover fully.
11 Nail Repair Tips for Peeling, Splitting, and Damaged Nails (Rescue Your Manicure Before It’s Too Late!)

1. Trim the Snag Before It Turns Into a Bigger Split

A loose corner can catch on clothing, towels, or hair and pull a small crack across the nail. Trimming the damaged edge early reduces pressure and gives the nail a smoother shape. A shorter nail also bends less during typing, cooking, and daily chores. This simple step can protect your manicure while new growth moves forward. Editor’s Choice
Wash and dry your hands before using clean clippers or manicure scissors. Remove only the loose section, and follow the natural curve of your fingertip. Never pull a peeling layer or cut into the pink attached part of the nail. If the edge remains sharp, smooth it gently with a fine file.
Use this quick rescue routine:
– Clean clippers with soap, water, and rubbing alcohol
– Make one careful cut instead of repeated squeezing
– Smooth rough edges with a fine-grit nail file
– Apply balm around the nail, never inside an open cut
A small bandage can protect a painful split during chores. Avoid trimming right after a long bath, when softened nails can bend and tear. Keeping the free edge just past your fingertip often makes recovery easier and prevents one weak spot from becoming a larger break.Trim the Snag Before It Turns Into a Bigger Split

BEZOX Well-Made Nail Clipper Set 2 Pcs, Wide Jaw Opening Nail Clipper fo…
 AmazonUSD 6.78

ME MAXEQUIP Cuticle Nail Scissors Curved Shape Professional Stainless St…
AmazonUSD 5.31
2. File in One Direction for a Cleaner, Stronger Edge

A rough file can leave peeling nails even thinner, especially when you saw back and forth across the tip. One-direction filing creates less friction and helps the edge feel smooth instead of ragged. This gentle technique works well for short, natural nails that split after polish removal or frequent hand washing. The goal is control, not speed. Editor’s Choice
Choose a fine glass or paper file instead of a coarse metal tool. Hold it nearly flat, move from one side toward the center, then lift it before returning. Use light strokes and stop as soon as the edge feels even. Filing too much can make the tip paper-thin and shorten the nail unnecessarily.
Build these small filing habits:
– Shape dry nails because wet tips fray more easily
– Round sharp corners without cutting deeply into sidewalls
– Reserve buffing for rare, gentle surface smoothing
– Replace files when their surface becomes rough or uneven
After filing, brush away dust and massage oil around the nail fold and free edge. Skip buffing completely when the surface is peeling in layers. A smooth edge reduces snags, while regular gentle care helps your nails stay neat between manicures without removing healthy nail tissue.File in One Direction for a Cleaner, Stronger Edge

Diodiva 3 Pcs Crystal Glass Nail File with Protective Case for Nature Nails
AmazonUSD 10.64
1 piece Set of Professional Crystal Nail Files, Glass Nail Files – Made …
AmazonUSD 5.71
3. Protect Your Hands From Water and Cleaning Chemicals

Repeated soaking and drying can make peeling nails worse. Nail layers absorb water, swell, and shrink as they dry, while detergents remove natural oils from your skin. Bleach, bathroom sprays, dish soap, and garden soil can leave fingertips dry, rough, and easier to split. Protecting your hands gives other repair steps a better chance to work. Editor’s Choice
You can still wash normally, but avoid long soaking whenever possible. Wear rubber gloves with a soft cotton lining for dishes, cleaning, gardening, hair coloring, and laundry. Choose lukewarm water, then pat your hands dry instead of rubbing them hard. If gloves become damp inside, remove them and let your hands dry before using a fresh pair.
Make hand protection part of your routine:
– Keep lined gloves beside the sink and cleaning supplies
– Apply cream after washing, focusing on nail folds
– Use tools instead of nails to scrape, open, or lift
– Dry beneath the free edge after every hand wash
Reapply cuticle oil after chores when your skin feels tight. Breathable gloves can reduce sweaty irritation and discourage picking. Less chemical exposure will not repair an existing split overnight, but it helps prevent fresh peeling and supports smoother growth as damaged nail gradually grows out.Protect Your Hands From Water and Cleaning Chem…

7Pair White Cotton Gloves for Eczema and Dry Hands – Moisturizing Gloves…
AmazonUSD 5.18

LANON 3 Pairs wahoo Skin-Friendly Dishwashing Cleaning Gloves, Reusable …
AmazonUSD 19.96
4. Make Cuticle Oil and Nail Balm a Daily Habit

Dry skin around the nails can crack, snag, and tempt you to pick. Cuticle oil softens the nail folds, while balm or hand cream helps hold moisture in longer. Together, these products make damaged fingers feel more comfortable and keep the manicure area looking tidy. They support repair by caring for the skin surrounding the growing nail. Editor’s Choice
Apply a small drop of oil to each hand once or twice daily. Focus on the base, sidewalls, and free edge, then massage for several seconds. Follow with balm on the fingertips and backs of your hands. Nighttime works well because the products can sit undisturbed while you sleep.
Try this simple evening routine:
– Remove rings so you can reach every nail fold
– Massage oil across cuticles, sidewalls, and free edges
– Press balm onto dry corners and cracked fingertips
– Keep a small bottle beside your bed for reminders
Avoid cutting living cuticle tissue or pushing it back aggressively. If the skin looks overgrown, soften it after washing and move it gently only when needed. Choose fragrance-free products if your skin reacts easily, and stop any product that causes burning or redness. Oil will not close a deep crack, but flexible, comfortable skin is less likely to tear or invite picking.Make Cuticle Oil and Nail Balm a Daily Habit


Neutrogena Norwegian Formula Hand and Nail Cream (1x 75ml), Nourishing, …
AmazonUSD 3.10
Cuticle Rehab Oil Balm by Sally Hansen for Women – 0.21 oz Balm
AmazonUSD 12.65
5. Use a Tea-Bag or Silk Patch as a Short-Term Split Shield

A small crack near the free edge can sometimes be covered while the nail grows past it. A thin silk patch or piece of tea-bag paper creates a temporary shield when paired with cosmetic nail glue. This method suits a shallow, painless split that does not reach the pink nail bed. It is not safe for bleeding, deep, hot, or swollen damage. Editor’s Choice
Begin with a clean, dry nail and cut the patch slightly larger than the crack. Use tweezers to place it over a tiny amount of nail glue or repair resin, following the product directions. Keep glue away from skin, then let the patch dry fully. File away raised edges and add one thin coat of clear polish only if the nail feels comfortable.
Keep the repair safe and simple:
– Choose cosmetic nail glue, never household superglue
– Cover only shallow cracks on the free edge
– Remove patches gently according to package directions
– Replace lifted patches that trap water or cause itching
Do not apply another patch for weeks without a break. If pain, bleeding, heat, swelling, or throbbing develops, remove the cosmetic product and seek medical advice. A good patch should feel smooth and nearly invisible. Its purpose is to prevent snagging for a few days, not to build a thick artificial extension.Use a Tea-Bag or Silk Patch as a Short-Term Spl…

Makartt Extra Strong Nail Glue with Brush – 5s Dries Quickly, Long-Las…
AmazonUSD 5.98
Tweezers and Nail Clippers Set 9 Pcs Precision Tweezers Kit, Black/Red
AmazonUSD 9.31
100 Pcs Silk Wrap for Nails, Nail Extension Wrap with Tweezers for Repai…
AmazonUSD 5.31
6. Remove Polish Gently Instead of Scraping It Away

Picking off polish can remove thin layers of your natural nail at the same time. Scraping dried color with another nail or a metal tool creates even more roughness. After several harsh removals, the surface may feel weak, bend easily, and peel beneath the next manicure. Gentle removal protects the layers you are trying to grow out. Editor’s Choice
For regular polish, soak a cotton pad with remover and hold it against the nail for several seconds. Wipe from the base toward the tip instead of scrubbing back and forth. Repeat the short soak if color remains. With gel polish, never peel or force the coating away. File the shine lightly, use remover-soaked cotton and wraps, and lift softened product only when it releases easily.
Make polish removal kinder:
– Protect surrounding skin with balm before using remover
– Choose good ventilation and avoid prolonged scrubbing
– Skip metal tools on thin or damaged natural nails
– Leave stains and minor ridges instead of over-buffing
Wash your hands afterward and apply oil or cream. A salon removal may be safer for thick acrylic, hard gel, or lifting product. Leaving a little color behind is better than stripping healthy nail layers. If the nail feels sore, hot, or paper-thin, give it time without polish before starting another manicure.Remove Polish Gently Instead of Scraping It Away

Nail HQ 100% Acetone Nail Polish Remover – 150ml – Express & Easy
AmazonUSD 4.17
300 Pack Lint-Free Nail Wipes – Soft, Durable Cotton Pads for Gel Polish…
AmazonUSD 3.98
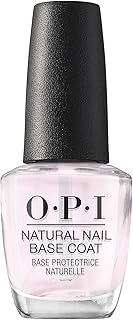
7. Choose Flexible Protection Over Harsh Nail Hardeners

A hardener may seem useful when nails bend or split, but extreme stiffness can make them snap under pressure. Natural nails need some flexibility when they meet keyboards, drawers, bags, and door handles. A thin flexible base coat often protects better than a rigid treatment that leaves the plate brittle. Comfort matters as much as strength during recovery. Editor’s Choice
Apply one thin layer to clean, dry nails and let it dry completely before adding color. Remove the coating gently when it begins to lift, since thick flakes can pull up natural nail layers. Look for products made for natural nails, and stop using any formula that stings, burns, or makes the skin red.
Choose a gentler coating routine:
– Select a flexible base coat for natural nails
– Keep polish away from broken skin and irritated cuticles
– Refresh protection only after careful product removal
– Take polish breaks when nails feel tender or thin
A base coat can reduce stains and everyday friction, but it cannot seal a deep split or treat an underlying condition. Keep nails short, moisturize the surrounding skin, and avoid stacking several hardeners. If itching, swelling, peeling, or lifting continues, discontinue the product and ask a healthcare professional about possible sensitivity. A comfortable coating that bends slightly is often the wiser choice.Choose Flexible Protection Over Harsh Nail Hard…
Nail Lacquer – Clear Shades – Chip Resistant & Long-Lasting Polish with …
AmazonUSD 19.84
Bonder Rubberized Basecoat for Long-Lasting Manicures & Pedicures | Prev…
AmazonUSD 13.45
Nail Care, Here To Stay Base Coat, Longwear, Prevents Nail Staining
AmazonCheck Price
8. Stop Picking, Biting, and Using Nails as Tiny Tools

A loose nail layer can feel impossible to ignore, but picking often turns a small flaw into a wide, uneven patch. Biting damages the nail folds and can move germs into tiny breaks in the skin. Opening packages, lifting stickers, and scraping pans also put strong pressure on the weakest edge. Changing these habits gives your nails a chance to stay intact. Editor’s Choice
Notice when your hands reach for your nails, such as during television, computer work, driving, or stressful moments. Keep a smooth file, pen, fidget object, or hand balm nearby. When you feel a rough edge, massage it instead of pulling it. A simple replacement action is easier to repeat than relying on willpower while distracted.
Swap damaging habits for safer choices:
– Use a tool or coin to open packages safely
– Keep recovering nails short with softly rounded edges
– Cover one tempting finger during high-risk activities
– Massage cuticle oil whenever you want to pick
A bitter nail product may help some people, provided it suits their skin and needs. Do not shame yourself after a setback. Clean the area, smooth only the loose edge, and restart your routine. If biting or picking causes repeated wounds, bleeding, or distress, a doctor or therapist can offer practical support. Fewer damaging moments each day can improve the manicure before the full nail grows out.Stop Picking, Biting, and Using Nails as Tiny T…

Mylee The Bite Stuff – Stop Biting Your Nails, Anti Nail Biting Nail Polish
Amazon£7.99
Diodiva 3 Pcs Crystal Glass Nail File with Protective Case for Nature Nails
AmazonUSD 10.64
9. Feed Nail Growth With Balanced Everyday Nutrition

The nail you see formed earlier, but new growth depends on your overall nutrition. Restrictive diets, skipped meals, and low protein intake may contribute to slow or fragile nails. No single food can repair peeling overnight, so focus on steady meals instead of quick supplement promises. Your nails benefit from the same balanced pattern that supports energy, skin, and hair. Editor’s Choice
Include protein such as eggs, yogurt, fish, tofu, beans, lentils, chicken, or nuts. Add colorful vegetables, fruit, whole grains, seeds, and healthy fats such as avocado. Iron, zinc, and other nutrients may matter when several symptoms appear together, but testing is better than guessing. Drink normally for your needs, while remembering that extra water alone will not close a split.
Support nail growth with these food habits:
– Add protein to breakfast, lunch, or afternoon snacks
– Pair beans and greens with vitamin C foods
– Choose nuts, seeds, or avocado for healthy fats
– Eat several colors of produce throughout each week
Ask a doctor before taking high-dose supplements, especially if you use medication or are pregnant. Large amounts of biotin can interfere with some lab tests. Ongoing brittle nails with tiredness, pale skin, hair shedding, or weight changes deserve medical attention. Balanced nutrition works slowly, so combine it with moisture and hand protection while healthy nail grows from the base.Feed Nail Growth With Balanced Everyday Nutrition


Free Soul Women’s Multivitamins with Marine Collagen & Hyaluronic Acid
AmazonUSD 18.63
Free Soul Vegan Protein Powder for Women, Pea & Hemp, 20g Protein, 600g
AmazonUSD 36.60
10. Give Gel, Acrylic, and Extensions a Careful Reset

Gel, acrylic, and extensions can look polished, but repeated applications and rough removal may leave natural nails thin. Damage often starts when lifted product is picked, pried, or glued down again. A short reset helps you see the nail surface clearly and gives it time to recover. The goal is not to abandon enhancements forever, but to use them with better care. Editor’s Choice
Arrange professional removal for thick acrylic or hard gel when possible. If you remove soak-off gel at home, follow the product instructions and use only gentle pressure after the coating softens. Never pull at a lifting edge, since it can take natural nail layers with it. Moisture trapped beneath lifted product may also irritate the nail area.
Use these steps during a nail reset:
– Trim natural nails short and smooth sharp edges
– Avoid peeling, scraping, or prying attached product
– Massage cuticle oil and hand cream every day
– Skip aggressive buffing that thins the nail plate
You can keep hands neat with a fine file, balm, and a thin flexible base coat if the surface is comfortable. When booking another set, ask for gentle preparation and no cuticle cutting. Persistent green, yellow, brown, or white changes, odor, pain, swelling, or lifting need medical advice instead of another cover-up. A careful break creates a stronger base for future manicures.Give Gel, Acrylic, and Extensions a Careful Reset
Diodiva 3 Pcs Crystal Glass Nail File with Protective Case for Nature Nails
AmazonUSD 10.64
Qufiiry Nail Clips, 10 Pcs Nail Soak Off Clip, Nail Polish Remover Clips…
AmazonUSD 6.64
11. Know When Nail Damage Needs a Dermatologist

One small split usually comes from dryness, impact, habits, or manicure stress. Nail changes that persist across several fingers may have another cause. Pain, swelling, lifting, thickening, crumbling, or unusual color should not be hidden beneath another layer of polish. Paying attention early can prevent a minor concern from becoming harder to manage.
Book a medical visit when damage lasts for weeks, keeps returning, or appears without a clear injury. Seek advice for a new or changing dark streak, green or yellow color with odor, bleeding, pus, strong tenderness, or hot swollen skin. Mention fatigue, hair loss, rashes, or other body changes because they may help explain the nail problem.
Protect the affected nail while you wait:
– Keep the area clean, short, and completely dry
– Avoid polish, glue, gel, acrylic, and harsh removers
– Never dig under the edge or cut into painful tissue
– Bring clear photos and a list of products used
A clinician may examine the nail and ask about injuries, habits, medications, and manicure history. Testing can help identify infection, skin conditions, nutritional concerns, or other causes. Do not cover a concerning color change before an appointment, since a bare nail is easier to assess. Getting the right advice can protect both your health and your next polished manicure.
Conclusion: Give Your Natural Nails a Real Chance to Recover

Damaged nail repair is mostly about small choices repeated often: trim snags, file gently, moisturize the nail folds, protect your hands, and stop pulling at loose layers. Keep manicures thin and easy to remove, give enhancements a careful reset, and get professional advice when changes are painful, unusual, or stubborn.
Healthy nails grow on their own schedule, so progress may show as a smoother edge before it shows as a perfect manicure. Save these tips for your next nail-care day, share the routine with a friend whose nails keep peeling, and let your rescue manicure begin with kinder everyday habits.
Note: We aim to provide accurate product links, but some may occasionally expire or become unavailable. If this happens, please search directly on Amazon for the product or a suitable alternative.
This post contains Amazon affiliate links, meaning we may earn a small commission if you purchase through our links, at no extra cost to you.
Amazon and the Amazon logo are trademarks of Amazon.com, Inc, or its affiliates.


Author

judieannrose@live.co.uk
Related posts

16 Hydrating Winter Face Masks For Instant Glow And Comfort (Dry Skin Will Love #8!)
- 0
- 4,417 words
Peeling, splitting, and thin nails can ruin a manicure in minutes when a tiny snag catches on a sweater, a split travels...
Read out all
20 Black Nail Designs So Gorgeous, You’ll Want To Copy Every Single One (Wait Until You See #17!)
- 0
- 5,695 words
Peeling, splitting, and thin nails can ruin a manicure in minutes when a tiny snag catches on a sweater, a split travels...
Read out all
20 Stunning Long Hairstyles That Make Every Day A Good Hair Day (The Layers Are Everything!)
- 0
- 5,046 words
Peeling, splitting, and thin nails can ruin a manicure in minutes when a tiny snag catches on a sweater, a split travels...
Read out all
19 Halloween Eye Makeup Ideas That’ll Make Your Eyes Impossible To Ignore (The Spider Look Is Everything!)
- 0
- 4,923 words
Peeling, splitting, and thin nails can ruin a manicure in minutes when a tiny snag catches on a sweater, a split travels...
Read out all
15 Best Hair Growth Supplements For Thicker-Looking Hair: The Nutrients You Should Know Before You Buy
- 0
- 4,348 words
Peeling, splitting, and thin nails can ruin a manicure in minutes when a tiny snag catches on a sweater, a split travels...
Read out all
20 Easy Halloween Makeup Ideas You Can Create In Minutes (Perfect For Last-Minute Plans!)
- 0
- 5,326 words
Peeling, splitting, and thin nails can ruin a manicure in minutes when a tiny snag catches on a sweater, a split travels...
Read out all


