
As an Amazon Associate I earn from qualifying purchases.
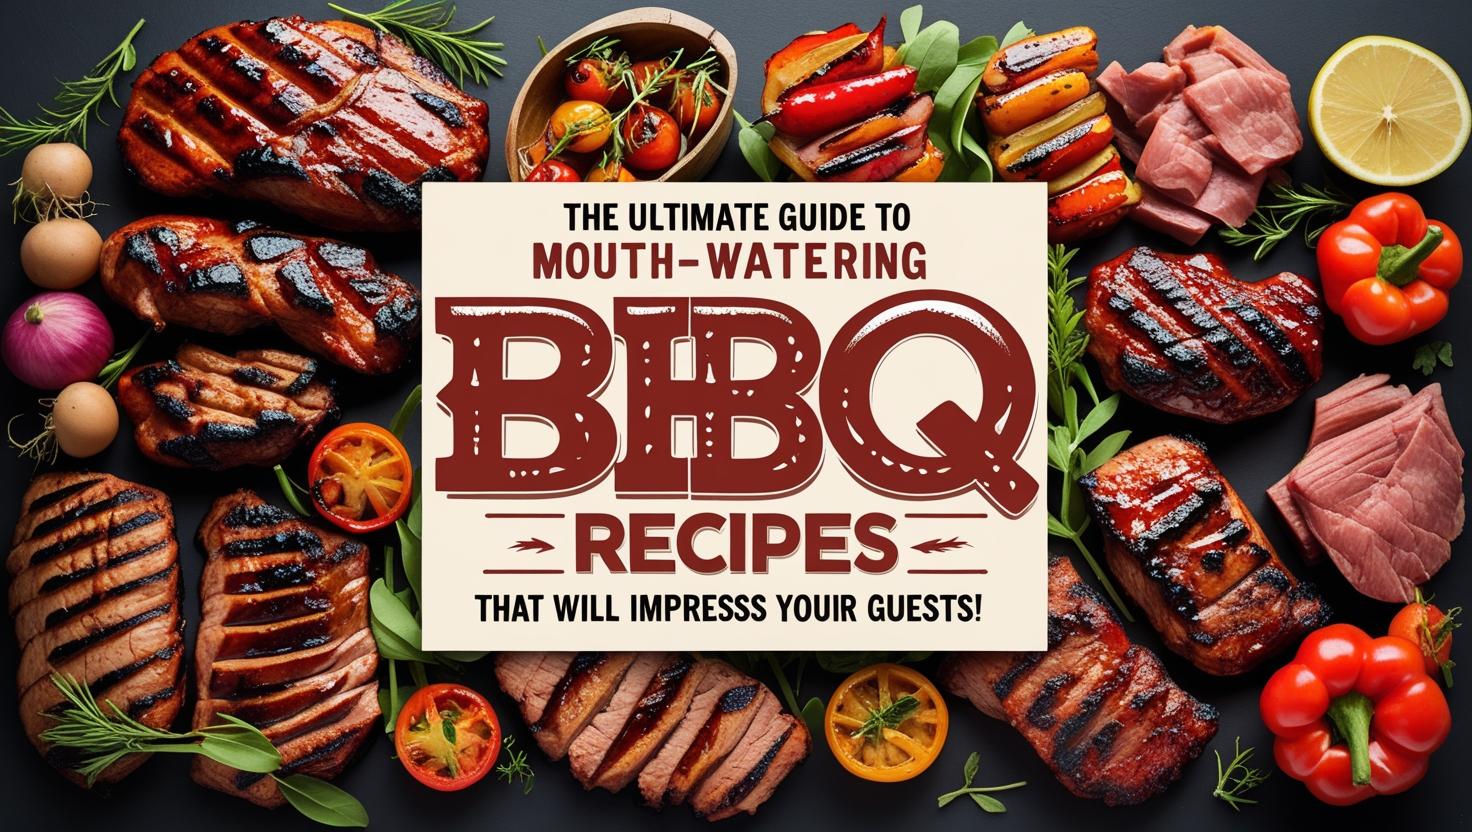
On the JJ Barnes Blog, outdoor partying is the order of the season, so check out this guide to mouth-watering BBQ recipes that will impress your guests.

Get ready to fire up the grill and wow your friends with these BBQ recipes! Summer is the perfect time to gather everyone around for a delicious barbecue feast that will have them coming back for seconds. Whether you’re a grilling novice or a seasoned pro, these mouth-watering recipes will make your next BBQ party unforgettable. From juicy meats to vibrant sides, you’ll find everything you need to create an impressive spread that leaves your guests raving long after the last bite.
With a focus on easy, flavorful recipes that cater to every palate, this guide is all about elevating your BBQ game. So grab your apron, get those coals glowing, and let’s dive into the world of delicious grilling!
1. Classic BBQ Ribs With a Twist

### 1. Classic BBQ Ribs With a Twist
Nothing says BBQ like tender, falling-off-the-bone ribs. These classic BBQ ribs are infused with a unique twist using a blend of spices and a homemade barbecue sauce that packs a flavor punch. Start by preparing your ribs; remove the membrane from the back for maximum tenderness. For the dry rub, you can whip up a delicious mix using brown sugar, paprika, garlic powder, and cayenne pepper for a kick. If you want to elevate your seasoning game, consider the SPICENTICE – the ultimate spice, seasoning & marinade BBQ rub grill gift set. This set is 100% natural and salt & sugar free, providing a variety of flavors that will enhance your BBQ experience.
For the sauce, mix ketchup, apple cider vinegar, Worcestershire sauce, and a hint of honey to balance the flavors. After seasoning the ribs, let them marinate for at least an hour (or overnight for more flavor!), then slow-cook them on the grill over indirect heat. A handy tool for this process is the DOQAUS digital meat thermometer. This instant-read thermometer with a backlight LCD screen ensures that you achieve the perfect internal temperature of 190°F for tender ribs.
Finish with a generous brush of sauce in the last few minutes to caramelize. For added flavor, consider incorporating smoked wood chips using a BBQ grill smoker box. This accessory allows you to infuse an authentic BBQ aroma into your ribs, enhancing the overall experience. Your guests will be lining up for seconds, so prepare for a crowd!
Ingredients:
– 2 racks of baby back ribs
– 1/4 cup brown sugar
– 2 tablespoons paprika
– 1 tablespoon garlic powder
– 1 teaspoon cayenne pepper (adjust for spice preference)
For the BBQ Sauce:
– 1 cup ketchup
– 1/4 cup apple cider vinegar
– 2 tablespoons Worcestershire sauce
– 2 tablespoons honey
Instructions:
1. Preheat your grill for indirect heat cooking.
2. Remove the membrane from the back of the ribs for better tenderness.
3. In a small bowl, mix together the brown sugar, paprika, garlic powder, and cayenne pepper to create the dry rub.
4. Generously rub the spice mixture over both sides of the ribs.
5. Wrap the seasoned ribs in plastic wrap and let them marinate in the refrigerator for at least 1 hour, or overnight for deeper flavor.
6. In a separate bowl, combine the ketchup, apple cider vinegar, Worcestershire sauce, and honey to make the BBQ sauce.
7. Place the marinated ribs on the grill over indirect heat.
8. Cook the ribs for 2.5 to 3 hours, maintaining a grill temperature of around 225°F to 250°F.
9. Use the DOQAUS digital meat thermometer to check the internal temperature, aiming for 190°F for optimal tenderness.
10. In the last 10-15 minutes of cooking, brush the ribs with the BBQ sauce to caramelize the glaze.
11. If desired, use a BBQ grill smoker box with soaked wood chips to infuse additional flavor during the last 30 minutes of cooking.
12. Once done, remove the ribs from the grill, let them rest for a few minutes, then slice and serve with extra BBQ sauce on the side. Enjoy your delicious creation!
Product Recommendations:
• DOQAUS digital meat thermometer
• SPICENTICE BBQ rub grill gift set
• BBQ grill smoker box
2. Grilled Veggie Skewers That Steal the Show

2. Grilled Veggie Skewers That Steal the Show
Grilling isn’t just for meat! Impress your guests with colorful grilled veggie skewers that are both delicious and healthy. Start by selecting a variety of vegetables like bell peppers, zucchini, cherry tomatoes, and red onion. Toss them in olive oil, garlic, and your favorite herbs for added flavor. For easy application, consider using an [olive oil spray bottle](https://www.amazon.co.uk/dp/B0DSLXZZPV?tag=jjbarnes-21) which allows you to coat the veggies evenly without the mess.
Thread the veggies onto skewers, alternating colors for a beautiful presentation. Using [skewers for grilling](https://www.amazon.co.uk/dp/B09CV8LVDX?tag=jjbarnes-21) ensures that your veggies are securely held together, making flipping them on the grill much easier. Grill them over medium heat until they’re tender and lightly charred, around 10-15 minutes. Serve these skewers alongside a tangy dipping sauce made from Greek yogurt, lemon juice, and dill.
Ingredients:
– 1 red bell pepper, cut into chunks
– 1 yellow bell pepper, cut into chunks
– 1 zucchini, sliced into rounds
– 1 red onion, cut into wedges
– 1 cup cherry tomatoes
– 3 tablespoons olive oil
– 3 cloves garlic, minced
– 1 teaspoon dried oregano
– 1 teaspoon dried basil
– Salt and pepper, to taste
– Wooden or metal skewers
For the Dipping Sauce:
– 1 cup Greek yogurt
– Juice of 1 lemon
– 1 tablespoon fresh dill, chopped
– Salt and pepper, to taste
Instructions:
1. In a large bowl, combine olive oil, minced garlic, oregano, basil, salt, and pepper.
2. Add the cut vegetables to the bowl and toss until evenly coated.
3. Let the veggies marinate for at least 30 minutes, or up to a few hours for deeper flavor.
4. Preheat your grill to medium heat.
5. Thread the marinated vegetables onto skewers, alternating colors for visual appeal.
6. Place the skewers on the grill and cook for 10-15 minutes, turning occasionally, until the veggies are tender and have nice grill marks.
7. While the skewers are grilling, prepare the dipping sauce by mixing Greek yogurt, lemon juice, dill, salt, and pepper in a small bowl.
8. Serve the grilled veggie skewers hot with the tangy dipping sauce on the side.
These veggie skewers are not just a side—they’re a star!
– Try marinating the veggies for a few hours to deepen the flavors.
– For a smoky flavor, consider adding marinated mushrooms or smoked paprika.
– Vegan and gluten-free, these skewers cater to a wide audience, ensuring everyone finds something they love at your BBQ.
If you want to take your grilling game to the next level, a [grill basket for vegetables](https://www.amazon.co.uk/dp/B07TV19T3S?tag=jjbarnes-21) can be a great addition to your setup. This portable BBQ grill basket allows you to easily grill smaller items like cherry tomatoes without losing them through the grill grates.
Product Recommendations:
• Olive oil spray bottle
• skewers for grilling
• grill basket for vegetables
3. Succulent Grilled Shrimp Tacos

### 3. Succulent Grilled Shrimp Tacos
If you’re planning a BBQ party, these grilled shrimp tacos are sure to impress your guests. Bursting with flavor and easy to make, they combine the freshness of shrimp with zesty toppings, making them a delightful addition to your menu. The marinade not only enhances the shrimp’s taste but also ensures they remain tender and juicy on the grill.
To take your presentation up a notch, serve your tacos in a taco holder stand, allowing everyone to build their own masterpiece without any mess. With the right mix of toppings and a refreshing drink, your BBQ will be the talk of the town!
Ingredients:
– 1 pound fresh shrimp, peeled and deveined
– 1/4 cup lime juice
– 1 tablespoon chili powder
– 2 cloves garlic, minced
– Salt and pepper to taste
– Corn tortillas (about 8)
– 2 cups shredded cabbage
– 1/4 cup chopped cilantro
– 1 jalapeño, finely chopped (optional)
– Additional toppings: avocado slices, fresh salsa, chipotle sauce
Instructions:
1. In a bowl, combine lime juice, chili powder, minced garlic, salt, and pepper. Add the shrimp and toss to coat. Let it marinate for about 30 minutes.
2. Preheat your grill to medium-high heat. If using skewers, thread the shrimp onto skewers for easy grilling.
3. Grill the shrimp for 2-3 minutes on each side, or until they turn pink and opaque.
4. While the shrimp are grilling, prepare the zesty slaw by mixing shredded cabbage, cilantro, lime juice, and jalapeño in a separate bowl.
5. Warm the corn tortillas on the grill for about 30 seconds on each side.
6. Assemble your tacos by placing grilled shrimp in each tortilla and topping with the zesty slaw.
7. Serve with additional toppings like avocado slices, fresh salsa, and chipotle sauce.
Your guests will appreciate the fresh flavors and the customizable options that these grilled shrimp tacos offer!
Product Recommendations:
• Grill skewers for shrimp
• taco holder stand
• lime juicer
4. BBQ Chicken Wings with Unique Glazes

### 4. BBQ Chicken Wings with Unique Glazes
Chicken wings are a BBQ staple, but you can elevate them with unique glazes that will leave your guests guessing! Start with a basic brine to keep the wings juicy. Combine salt, sugar, and water, and soak the wings for a couple of hours.
Once brined, grill the wings until crispy, brushing on various glazes during the last few minutes. Think about a spicy honey sriracha glaze or a tangy barbecue sauce mixed with pineapple juice. For a delightful variety, consider using a BBQ Sauce Variety Pack, which includes unique flavors like root beer BBQ sauce and jalapeno wing sauce.
Experiment with different glazes to find your favorite mix; you can even prepare a sampling platter! Don’t forget to serve with classic sides like celery sticks and ranch dipping sauce for the perfect touch. For extra flair, consider tossing the wings in dry rubs before grilling; lemon pepper or garlic parmesan are great options.
Ingredients:
– 2 lbs chicken wings
*For the Brine:*
– 1/4 cup salt
– 1/4 cup sugar
– 4 cups water
*For the Glazes:*
– 1/4 cup honey
– 2 tablespoons sriracha
– 1/2 cup barbecue sauce
– 1/4 cup pineapple juice
*Optional Dry Rubs:*
– 2 tablespoons lemon pepper
– 2 tablespoons garlic parmesan
Process:
1. In a large bowl, combine salt, sugar, and water to create the brine.
2. Add the chicken wings to the brine, ensuring they are fully submerged. Cover and refrigerate for 2-4 hours.
3. Preheat your grill to medium-high heat.
4. Remove the wings from the brine and pat them dry with paper towels.
5. Grill the wings for about 20-25 minutes, turning occasionally until they are crispy and cooked through.
6. In the last few minutes of grilling, brush the wings with your chosen glaze, allowing it to caramelize slightly.
7. For a variety, toss some wings in dry rubs before grilling.
8. Once done, remove the wings from the grill and let them rest for a few minutes.
9. Serve with celery sticks and ranch dipping sauce, and enjoy your BBQ feast!
Product Recommendations:
• BBQ Sauce Variety Pack
• Grill Brush Set
• Wing Rack for Grilling
5. Juicy Burger Bar with Toppings Galore

5. Juicy Burger Bar with Toppings Galore
Who doesn’t love a good burger? Set up a DIY burger bar at your BBQ, allowing guests to craft their own masterpiece. Start with high-quality ground beef, seasoned simply with salt and pepper. Shape into patties and grill to perfection using a Grill Press. This heavy-duty burger smasher ensures your patties cook evenly and achieve that desirable sear, adding great texture and flavor.
Offer a variety of buns, from classic sesame to whole grain, along with a plethora of toppings. Think crispy bacon, sautéed mushrooms, various cheeses, and an array of sauces from classic ketchup to gourmet aioli. To keep everything organized and easily accessible, consider using a condiment dispenser set. This four-part holder makes it simple for guests to add their favorite flavors without any mess.
For added fun, label each topping with a decorative sign. Consider providing veggie patties for non-meat eaters; black bean or quinoa burgers are delicious alternatives. Don’t forget the sides! Fries, coleslaw, and pickles make the perfect accompaniments. Your guests will love personalizing their burgers, making every bite unique!
Ingredients:
– 2 lbs high-quality ground beef
– Salt and pepper to taste
– Burger buns (variety: sesame, whole grain, etc.)
– Toppings:
– Crispy bacon
– Sautéed mushrooms
– Assorted cheeses (cheddar, Swiss, blue cheese, etc.)
– Lettuce, tomatoes, and onions
– Pickles
– Sauces:
– Ketchup
– Mustard
– Mayonnaise
– BBQ sauce
– Gourmet aioli
– Optional veggie patties (black bean or quinoa)
Instructions:
1. Prepare the Patties: In a bowl, season the ground beef with salt and pepper. Divide the meat into equal portions and shape into patties, making a slight indentation in the center to prevent puffing during cooking.
2. Preheat the Grill: Heat your grill to medium-high heat. If using a Grill Press, make sure it’s ready to go.
3. Grill the Patties: Place the patties on the grill. Use the Grill Press to gently flatten them for an even cook. Grill for about 4-5 minutes per side for medium doneness, or until they reach your desired level of doneness.
4. Prep the Toppings: While the patties are grilling, prepare your toppings. Cook the bacon and sauté the mushrooms, and arrange all toppings in separate bowls.
5. Set Up the Burger Bar: Arrange the buns and toppings on a table. Use the condiment dispenser set for sauces to keep everything tidy and easy to access.
6. Serve and Enjoy: Once the patties are done, let guests build their burgers with their favorite toppings. Serve with sides like fries and coleslaw for a complete BBQ experience.
This DIY burger bar is sure to make your BBQ unforgettable, with everyone crafting their perfect burger creation!
Product Recommendations:
• Grill Press
• Condiment Dispenser Set
• High-Quality Ground Beef
6. Delectable Corn on the Cob with Flavor Boosts

### 6. Delectable Corn on the Cob with Flavor Boosts
Grilled corn on the cob is a must-have at any BBQ! Start by soaking the corn in water for about 30 minutes to keep it moist while grilling. You can either leave the husks on or remove them for a nice char.
Grill the corn over medium heat, turning occasionally until it’s tender and slightly charred. Then it’s time for the fun part: toppings! Spread on some flavored butter using a flavored butter spreader, like garlic herb or chili lime, or sprinkle with cotija cheese and fresh cilantro for a Mexican street corn twist.
This simple side can easily be customized to fit any theme or flavor profile! Guests will adore the flavor explosion that grilled corn brings to their plates.
#### Ingredients:
– 4 ears of corn, husked or un-husked
– Water (for soaking)
For Flavored Butter:
– ½ cup unsalted butter, softened
– 2 cloves garlic, minced (for garlic herb butter)
– 1 tablespoon fresh herbs (parsley, chives, or cilantro for garlic herb butter)
– 1 tablespoon lime juice (for chili lime butter)
– 1 teaspoon chili powder (for chili lime butter)
For Toppings:
– ½ cup cotija cheese, crumbled
– Fresh cilantro, chopped
– Smoked paprika or cayenne pepper (to taste)
– Honey (for sweet version)
– Ground cinnamon (for sweet version)
#### Instructions:
1. Soak the Corn: Begin by soaking the corn in water for about 30 minutes. This helps keep it moist while grilling.
2. Prepare the Flavored Butter: In a bowl, mix the softened butter with your choice of garlic, herbs, lime juice, and chili powder. Adjust ingredients according to your flavor preference.
3. Preheat the Grill: Heat your grill to medium heat while the corn soaks.
4. Grill the Corn: Place the soaked corn on the grill. If you left the husks on, grill them directly. If you removed the husks, you can turn them every few minutes until they’re tender and have nice char marks, about 10-15 minutes.
5. Add Toppings: Once grilled, remove the corn from the grill. Spread the flavored butter generously over the corn. For a Mexican street corn twist, sprinkle with cotija cheese and fresh cilantro.
6. Spice it Up or Sweeten: For a spicy kick, add smoked paprika or cayenne pepper. For a sweet version, brush with honey and sprinkle with ground cinnamon.
7. Serve and Enjoy: Serve the corn immediately, allowing guests to choose their toppings.
With these easy steps, you’ll have a delicious side that will elevate your BBQ recipes and impress all your guests!
Product Recommendations:
• Grill corn on the cob holder
• Flavored butter spreader
• Corn on the cob grilling basket
7. Refreshing Summer Salad with Grilled Peaches

### 7. Refreshing Summer Salad with Grilled Peaches
Balance out your BBQ meal with a light, refreshing salad that features grilled peaches! Start with a base of mixed greens, then add grilled peach slices for a sweet and smoky flavor. You can use a grill basket for vegetables to make grilling your peaches easy and prevent them from slipping through the grates. Toss in nuts for crunch, like almonds or walnuts, and some crumbled feta for a creamy touch.
Drizzle with a balsamic reduction sauce to tie all the flavors together; this gourmet glaze adds a thick, sweet finish that elevates the taste of your salad. It’s perfect alongside heavier mains, offering a bright and delicious contrast. For added protein and texture, consider incorporating quinoa or farro. After washing your greens, using an OXO Good Grips salad spinner will ensure they’re perfectly dry, allowing the dressing to adhere better. Serve the salad family-style in a large bowl for a communal feel at your BBQ.
This colorful dish not only tastes great but also adds a beautiful pop to your BBQ spread!
#### Ingredients:
– 4 cups mixed greens (spinach, arugula, or spring mix)
– 2 ripe peaches, halved and pitted
– 1/2 cup nuts (almonds or walnuts), roughly chopped
– 1/2 cup crumbled feta cheese
– 1 cup cooked quinoa or farro (optional)
– 1/4 cup balsamic reduction sauce
– Olive oil
– Salt and pepper to taste
#### Instructions:
1. Preheat your grill to medium-high heat.
2. Brush the peach halves with a little olive oil and season with salt and pepper.
3. Place the peaches on a grill basket and grill for about 4-5 minutes on each side, or until they have nice grill marks and are slightly softened.
4. While the peaches are grilling, rinse the mixed greens thoroughly and spin them dry using a salad spinner.
5. In a large bowl, combine the mixed greens, grilled peach slices (sliced into wedges), chopped nuts, and crumbled feta.
6. If using, add the cooked quinoa or farro to the bowl.
7. Drizzle the balsamic reduction sauce over the salad and gently toss everything together to combine.
8. Taste and adjust seasoning with additional salt and pepper if needed.
9. Serve the salad in a large bowl for a family-style presentation at your BBQ.
This refreshing summer salad will not only complement your BBQ recipes but also impress your guests with its vibrant flavors and textures!
Product Recommendations:
• Grill basket for vegetables
• OXO Good Grips salad spinner
• balsamic reduction sauce
8. Decadent S’mores Bar for Dessert

### 8. Decadent S’mores Bar for Dessert
No BBQ is complete without a sweet finish! Create a s’mores bar where guests can build their own delicious treats. Set out an array of graham crackers, chocolate bars, and marshmallows, along with fun variations like flavored marshmallows or different types of chocolate. For roasting marshmallows over the grill, be sure to have skewers on hand. These skewers for roasting marshmallows are extra long and perfect for achieving that gooey and toasted core.
For an adult twist, consider adding options like peanut butter cups or Nutella to the mix. You might also want to include some fruit for a fresh option; strawberries or banana slices work beautifully. To enhance the experience, set up a cozy area with outdoor blankets and pillows, creating an inviting space for dessert under the stars. And don’t forget the napkins—things can get messy! A s’mores making kit can also simplify preparation, ensuring you have all the essentials ready to impress your guests. This creative dessert will be a hit, adding a playful element to your BBQ.
Ingredients:
– Graham crackers
– Chocolate bars (milk chocolate, dark chocolate, or flavored)
– Marshmallows (regular and flavored)
– Peanut butter cups or Nutella (optional)
– Fresh fruit (strawberries, banana slices)
– Skewers for roasting marshmallows
– Napkins
Instructions:
1. Set Up the S’mores Station: Arrange graham crackers, different types of chocolate, and marshmallows on a table. Include bowls for the optional peanut butter cups and fresh fruit to allow for creative combinations.
2. Prepare the Skewers: Lay out the skewers for guests to use for roasting marshmallows. Make sure they are long enough to keep hands safe from the grill.
3. Create a Cozy Space: Arrange outdoor blankets and pillows nearby to create a comfortable seating area for guests to enjoy their s’mores.
4. Roast the Marshmallows: Guests can skewer their marshmallows and roast them over the grill until they are golden brown and gooey.
5. Assemble the S’mores: Once roasted, guests can place the marshmallow between two graham crackers with a piece of chocolate (and any other desired toppings) and enjoy!
6. Clean Up: Keep napkins nearby for easy clean-up and to manage the sticky fingers that come with this delicious treat.
This s’mores bar adds a fun and interactive element to your BBQ, making dessert the highlight of the evening!
Product Recommendations:
• Long roasting skewers
• S’mores making kit
• Outdoor picnic blankets
9. Tips for Perfect Grilling Every Time

To ensure your BBQ recipes shine, mastering the art of grilling is key! Start with preheating your grill for even cooking. For charcoal grills, make sure the coals are covered in ash for optimal heat. For gas grills, allow it to heat up for at least 10-15 minutes.
Using a meat thermometer takes away the guesswork; it helps you serve perfectly cooked meats every time. Consider the [Digital Meat Thermometer](https://www.amazon.co.uk/dp/B07WKKS4HB?tag=jjbarnes-21), which features an instant-read display for quick and accurate results.
Basting your meats with a marinade or sauce while grilling adds layers of flavor. However, remember not to drown them in sauce too soon, or they won’t caramelize nicely. A handy tool for this is the [BBQ Basting Brush](https://www.amazon.co.uk/dp/B087QY3P2V?tag=jjbarnes-21), which allows you to apply just the right amount without making a mess.
Experiences:
– Don’t flip your meats too often; let them sear properly to lock in juices.
– Keep a spray bottle of water handy to combat flare-ups. The [Grill Spray Bottle](https://www.amazon.co.uk/dp/B07LH1FLPF?tag=jjbarnes-21) is perfect for this task, allowing you to quickly douse flames without disrupting your cooking.
– Clean your grill grates before and after grilling for the best results.
With these tips and the right tools, you’ll be the BBQ master everyone admires!
—
Recipe: Classic BBQ Ribs
Ingredients:
– 2 racks of baby back ribs
– 2 tablespoons olive oil
– 2 teaspoons salt
– 1 teaspoon black pepper
– 1 tablespoon paprika
– 1 tablespoon garlic powder
– 1 tablespoon onion powder
– 1 teaspoon cayenne pepper (optional for spice)
– 1 cup BBQ sauce (your favorite brand or homemade)
Instructions:
1. Preheat your grill to medium heat, ensuring it’s ready for indirect grilling.
2. Remove the silver skin from the back of the ribs for improved tenderness.
3. In a small bowl, mix together salt, pepper, paprika, garlic powder, onion powder, and cayenne pepper.
4. Rub the olive oil all over the ribs, then generously apply the spice mixture on both sides.
5. Place the ribs on the grill bone-side down, away from the direct heat. Close the lid and cook for about 2 to 2.5 hours, maintaining a steady grill temperature.
6. During the last 30 minutes, baste the ribs with BBQ sauce, flipping them every 10 minutes to create a sticky glaze.
7. Once the ribs are tender and the meat pulls away from the bone, remove them from the grill.
8. Let the ribs rest for about 10 minutes before slicing and serving.
These classic BBQ ribs are sure to impress your guests and elevate your BBQ recipes to the next level!
Product Recommendations:
• Digital Meat Thermometer
• BBQ Basting Brush
• Grill Spray Bottle
10. Pairing Drinks with Your BBQ Menu

When hosting a BBQ, the right drink selection can elevate the entire experience. Whether you’re serving beers, wines, or creative cocktails, having a variety of refreshing options ensures all your guests will find something they enjoy. For a unique twist, consider homemade lemonade or iced tea infused with fresh herbs like mint or basil. These drinks not only taste great but also add a special touch to your gathering.
To make serving drinks seamless, a stylish drink dispenser like the Rink Drink 6.5L is ideal. This large jug allows guests to serve themselves while adding an elegant aesthetic to your BBQ setup. If your event has a specific theme, tailor your cocktails to match. For instance, margaritas can set the mood for a Mexican night, while mojitos bring a tropical vibe. A cocktail shaker set is essential for mixing, and with its 7 pieces, including a muddler and strainer, you can impress your guests with expertly crafted drinks.
For those who prefer non-alcoholic options, mocktails made with fresh fruit and sparkling water are a fantastic choice. Make sure to have plenty of reusable straws available, as they add a fun and eco-friendly element to your beverages. Plus, keeping your guests hydrated is crucial, so don’t forget to provide ample water. Pairing drinks with food can enhance flavors: citrusy cocktails complement seafood beautifully, while bold red wines are perfect with grilled meats.
### Refreshing Lemonade with Mint
Ingredients:
– 1 cup fresh lemon juice (about 4-6 lemons)
– 1 cup granulated sugar
– 4 cups water
– Fresh mint leaves (about 10-15 leaves)
– Ice
– Lemon slices (for garnish)
Process:
1. In a medium saucepan, combine 1 cup of water and the sugar, and heat on medium until the sugar dissolves completely to create a simple syrup.
2. Remove the saucepan from heat and add fresh mint leaves. Let it steep for about 30 minutes, then strain the mint leaves out.
3. In a large pitcher, combine the fresh lemon juice, the mint-infused simple syrup, and the remaining 3 cups of water. Stir well.
4. Taste and adjust sweetness if needed, adding more sugar or water to your preference.
5. Chill the lemonade in the refrigerator for at least an hour before serving.
6. Serve over ice and garnish with lemon slices and a few mint leaves for a refreshing touch.
### Sparkling Berry Mocktail
Ingredients:
– 1 cup mixed berries (strawberries, blueberries, raspberries)
– 2 tablespoons honey or agave syrup
– 1 tablespoon fresh lemon juice
– Sparkling water
– Ice
– Mint leaves (for garnish)
Process:
1. In a blender, combine the mixed berries, honey (or agave syrup), and lemon juice. Blend until smooth.
2. Strain the mixture through a fine-mesh sieve into a pitcher to remove the seeds.
3. To serve, fill a glass with ice, add about ¼ cup of the berry mixture, and top with sparkling water.
4. Stir gently to combine and garnish with fresh mint leaves.
5. Enjoy this refreshing mocktail that’s perfect for all ages!
Product Recommendations:
• Rink Drink 6.5L Drink Dispenser
• Cocktail Shaker Set with 7 Pieces
• Reusable Silicone Straws
Conclusion: Elevate Your BBQ Game

With these mouth-watering BBQ recipes and tips, you’re all set to impress your guests at your next gathering. Whether it’s the juicy ribs, colorful skewers, or delightful desserts, there’s something for everyone to enjoy. Remember, it’s all about good food, great company, and making lasting memories around the grill. So gather your friends, fire up that grill, and enjoy the delicious adventure!
Don’t forget to experiment and put your unique twist on these recipes, transforming your BBQ into a culinary masterpiece!
Note: We aim to provide accurate product links, but some may occasionally expire or become unavailable. If this happens, please search directly on Amazon for the product or a suitable alternative.
This post contains Amazon affiliate links, meaning I may earn a small commission if you purchase through my links, at no extra cost to you.
Amazon and the Amazon logo are trademarks of Amazon.com, Inc, or its affiliates.
Author
judieannrose@live.co.uk
Related posts

20 Refreshing Summer Recipes That Are So Easy, You’ll Make Them All Week Long!
From bright salads to zesty drinks, these recipes are not just simple, they’re bursting with flavor and are sure to keep you...
Read out all
16 Meal Prep Ideas That Will Save You Time and Keep You Healthy (You’ll Love #9!)
With these 16 meal prep ideas, you’ll not only save time but also create delicious, health-conscious meals that excite your palate. Whether...
Read out all
Top Tips for Cooking Veggies Like a Pro: Enhance Flavor and Texture in Every Dish
Whether you’re a seasoned chef or just starting your culinary journey, these veggie cooking tips will elevate your dishes, making them not...
Read out all
How to Bake Irresistible Easter Treats: Step By Step Guide to Delicious Desserts
From pastel-colored cookies to decadent cakes, we have everything you need to make this Easter unforgettable. Let’s dive into the world of...
Read out all
Step By Step: How to Elevate Your Summer BBQ with Delicious Vegetarian Grilling Ideas
From vibrant veggies to scrumptious plant-based proteins, there’s a whole world of flavors waiting for you. Whether you’re hosting a big gathering...
Read out all
22 Superfoods You Must Include in Your Diet (Especially #11 for Energy!)
In a world where wellness has become a vital part of our daily lives, superfoods have emerged as the heroes of nutrition,...
Read out all